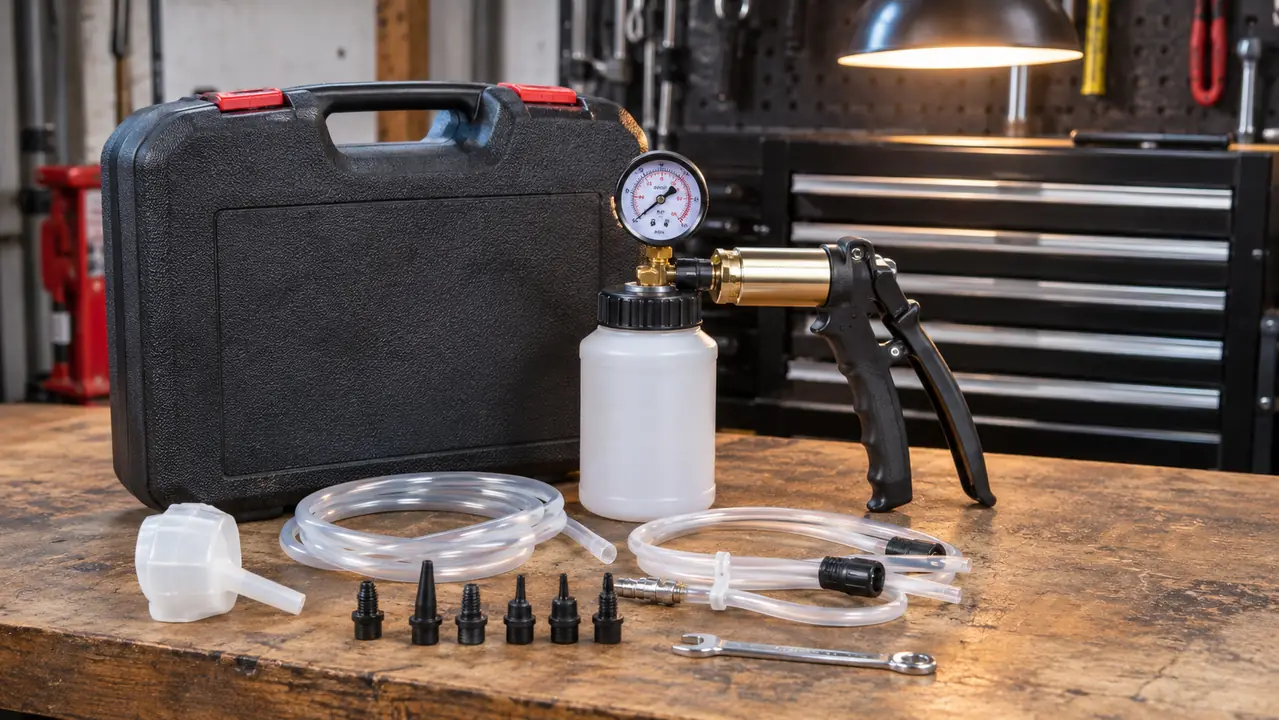
If you have ever tried to bleed brakes the old way, you know the dance. One person under the car, one person in the driver seat, and a lot of shouting through an open door. Pump the pedal. Hold it. Let it out. Check the fluid. Repeat until your legs ache and your patience is gone. I did it that way for years, and it works, but it takes two people and a fair amount of trust that the person on the pedal actually heard you. The last time I did it that way was on my 2011 F-150, with Marlene on the pedal and me flat on my back under the frame. We went through the whole routine twice before the pedal felt right, and I still had to redo the right rear corner because I thought I heard 'hold' when she said 'let out.' When Marlene's 2016 Honda CR-V needed pads and rotors last year, I decided there had to be a better way. I picked up the Orion Motor Tech one-man brake bleeding kit with the hand vacuum pump and dial gauge, and I bled all four corners by myself in about an hour and a half.
This guide is for the home mechanic who works alone in a driveway or a one-car garage, the person who would rather spend a Saturday doing the job than paying a shop rate. I have been turning wrenches for over 40 years, 30 of them on loaders and graders for a county road department, and I still think bleeding brakes is one of those jobs that intimidates people more than it should. I am not saying the old way is wrong. If you have a second person and a full afternoon, it still works fine. But for anyone who works alone, a vacuum bleeder is worth a look. The OMT kit does not make it effortless, but it makes it a one-person job. Here is exactly how I did it, what I learned, and where the kit falls short.
Bleed your brakes alone without the two-person shouting match
The Orion Motor Tech one-man brake bleeder kit turns a two-person chore into a solo job. Hand vacuum pump, dial gauge, silicone tubes, and a blow-molded case to keep it all together.
Amazon Check Today's Price on Amazon →What You Need Before You Start
Before I get into the steps, let me be clear about what this job actually requires. You need the Orion Motor Tech brake bleeder kit, a box-end wrench that fits your bleeder valves, a catch container, and fresh brake fluid. On the CR-V, the bleeder valves are 8mm, but check yours before you start. Use a six-point box end if you have one. A twelve-point can round off a valve that has been sitting in road salt for years, and a rounded bleeder valve turns a one-hour job into an afternoon. You also need the vehicle safely supported. I used my ARCAN 3-ton aluminum low-profile floor jack to lift the CR-V and set jack stands under it. I never get under a vehicle on a jack alone. The jack lifts, the stands hold.
You also need to know which corner to start with. The rule is simple: start at the wheel farthest from the master cylinder and work your way closer. On most vehicles, that means right rear, left rear, right front, left front. On the CR-V, that order worked fine. If you are not sure about your vehicle, a quick check of the service manual will tell you. Getting the order wrong does not ruin anything, but it makes the job take longer and it can leave air trapped in the system.
Step 1: Set Up the Vehicle and Gather Your Tools
Park on level ground, chock the wheels, and loosen the lug nuts on the wheels you plan to remove before you jack the car up. I loosened all four, then lifted the CR-V one corner at a time with the ARCAN jack and set a jack stand under each corner. The ARCAN's low profile matters here. It has a 3.75-inch minimum height, so it slides under the CR-V without a block of wood, and it lifts to 18 inches, which is plenty of room to work on a caliper. The kit comes in a blow-molded storage case, so everything stays organized. I laid the case open on the bench next to my rolling tool chest and pulled out the pump, the silicone tubes, and the adapter set.
The OMT kit's tubes are made from premium silicone, and that matters more than you might think. Silicone resists heat and brake fluid better than the cheap vinyl tubing you find on some kits, and it seals better on the bleeder valve. I have used kits with vinyl tubes that went soft after one job. The silicone tubes on this kit still look new after a year of sitting in the case.
Before you open the brake system, take the cap off the master cylinder reservoir and top it off with fresh fluid. Brake fluid is cheap. A dry master cylinder is not. I keep a bottle of DOT 3 in the garage for exactly this kind of job. The CR-V takes DOT 3, and so does the F-150, so one bottle covers both. Check your owner's manual for the right spec for your vehicle.
Step 2: Attach the Tube to the Bleeder Valve
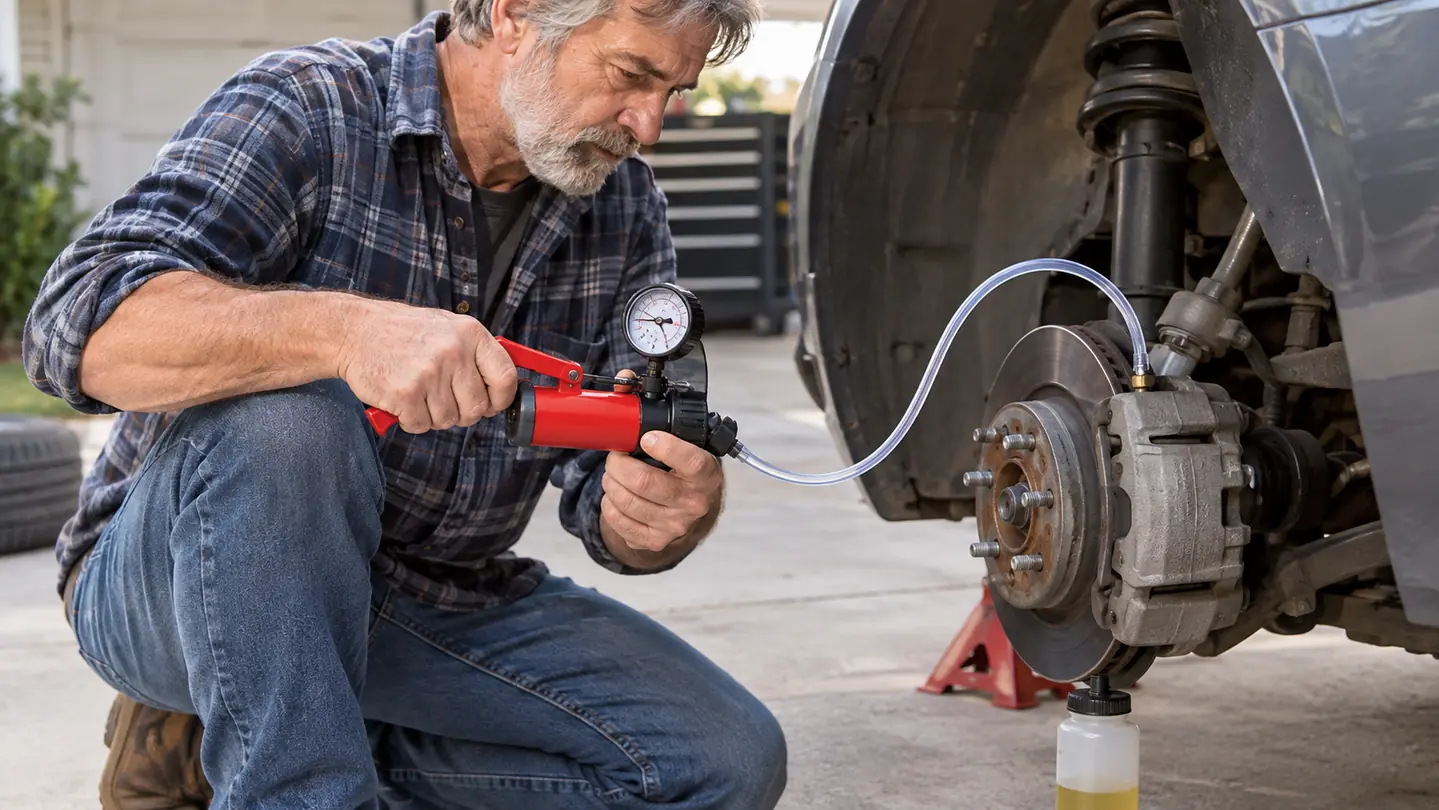
With the wheel off, find the bleeder valve on the caliper. It is a small nipple with a rubber dust cap. Remove the cap, put the box-end wrench on the valve, and slip the silicone tube over the nipple. The fit should be snug. If it is loose, you will draw air in around the valve instead of pulling fluid through the system, and you will be chasing bubbles all afternoon.
This is where the OMT kit earns its keep. The silicone tube seals well enough that I could watch old fluid move through the line without seeing a stream of bubbles around the valve. On a two-person bleed, a loose tube is just an annoyance because the pedal pressure pushes fluid through anyway. With a vacuum pump, a bad seal at the valve means you are pulling air, not fluid. The premium silicone tubes are the difference between a clean bleed and a frustrating one.
Step 3: Pump the Vacuum and Open the Valve
Close the bleeder valve, attach the pump to the other end of the tube, and pump the handle a few times to build vacuum. The dial gauge on the pump tells you where you are. I aimed for about 15 to 20 inches of vacuum, which is enough to pull fluid through without drawing air past the threads of the valve. If you pull too hard, you can pull air in around the threads, so keep an eye on the gauge and do not go wild.
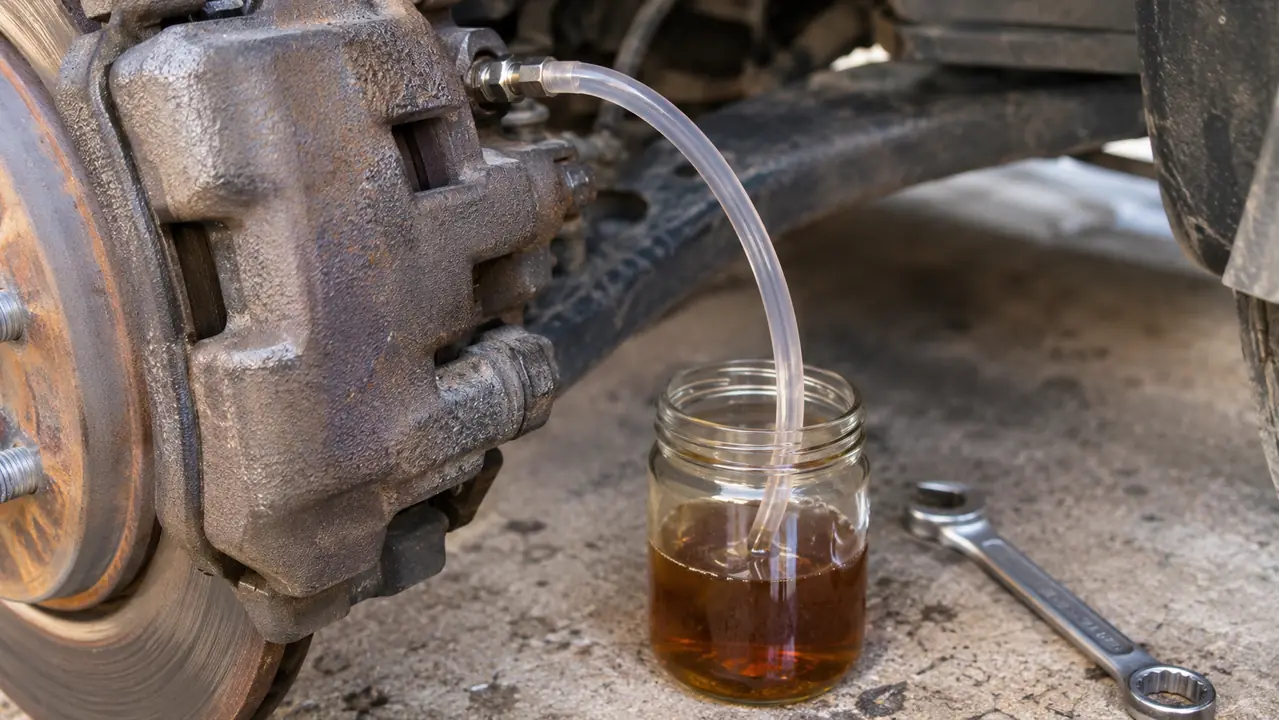
Once you have vacuum, open the bleeder valve a quarter turn with the wrench. You will see old fluid start to move through the tube into the catch container. Let it run until the stream is steady and free of bubbles, then close the valve before you release the vacuum. That last part matters. If you release the vacuum with the valve open, you can pull air back into the system.
I will be honest, the first time I did this I opened the valve too far and fluid sprayed everywhere. The tube stayed on, but the stream was messy, and a line of old fluid ran down the caliper and onto the shop floor before I got the valve shut. I spent the next twenty minutes cleaning up with brake cleaner and rags. A quarter turn is enough. You do not need the valve wide open. The vacuum does the work, and the wrench is just there to crack the valve open and shut it again.
Step 4: Work Through the Corners in the Right Order
With the first corner done, close the valve, remove the tube, and move to the next corner in the order I mentioned: right rear, left rear, right front, left front. Top off the master cylinder between corners. I checked it every time, and I still managed to let it get low once. That happened on the left front, the last corner. My son Travis called while I was between corners, and I skipped the reservoir check to take the call. The pedal went spongy on the test drive, and I had to pull back into the driveway, top off the reservoir, and re-bleed that corner. It cost me an extra twenty minutes. Learn from my mistake and check the reservoir every single time.
At each corner, the routine is the same: attach the tube, build vacuum, crack the valve, watch the fluid, close the valve, release the vacuum. The first corner usually takes the longest because old fluid is moving through the whole line. By the last corner, the fluid coming out should look clean and the whole job feels almost routine.
The dial gauge is genuinely useful here, not just a gimmick. On a hand vacuum pump without a gauge, you are guessing at how much vacuum you are pulling. With the OMT kit, I could see exactly where I was and adjust. It also helps you notice a problem early. If the gauge shows vacuum but no fluid is moving, you have a blockage or a bad seal somewhere, and it is better to find that out at the first corner than the last.
Step 5: Check the Pedal and Finish Up
When all four corners are done, top off the master cylinder one more time, put the cap on, and pump the brake pedal a few times before you start the engine. The pedal should feel firm, not spongy. If it feels soft, you have air in the system and you need to go back through the corners. If it feels firm, start the engine and press the pedal again. Power brakes will drop the pedal slightly when the engine runs, but it should still feel solid. Then take the car around the block and do a few firm stops from about 30 miles an hour. The pedal should stay high and the car should stop straight. That road test is the real check, and it is the one I trust more than the feel of the pedal in the driveway.
Then comes the part people forget: clean up. Wipe down the bleeder valves, put the dust caps back on, and rinse the catch container with water before the old fluid dries into a crust. Brake fluid eats paint, so I keep a rag under the catch container the whole time and I wipe up any spills immediately. The OMT kit's blow-molded case makes the cleanup easy. Everything goes back in the case, the case goes on the shelf, and the job is done.
I also take a minute to write the date and mileage in a small notebook I keep in the truck. It is not fancy, but it tells me when the brakes were last bled. On a vehicle I plan to keep for years, that notebook has saved me more than once.
What Else Helps
A few things make the job easier that are not in the kit. A second wrench on the bleeder valve, one to crack it and one to hold the line, keeps the tube from twisting. A cheap turkey baster pulls old fluid out of the master cylinder before you top it off, so you are not mixing old and new as much. And a piece of cardboard under the catch container catches the drips that always happen. I also keep a second catch container ready. The first one fills faster than you expect on a vehicle that has never been bled, and swapping containers mid-corner without losing vacuum is harder than it sounds. None of these are required, but they all make the job smoother.
The silicone tubes are the difference between a clean bleed and a frustrating one. A bad seal at the valve means you are pulling air, not fluid.
Skip the two-person brake bleed and do it yourself
The Orion Motor Tech one-man brake bleeder kit with hand vacuum pump and dial gauge is the tool I reach for when Marlene's CR-V needs its brakes bled. It fits in a blow-molded case and works on nearly any vehicle.
Amazon Check Today's Price on Amazon →